If someone asked me what my favorite food is, I would easily say a charcuterie board. I know it’s not a meal or a dish per say, but as someone who has a hard time picking and loves variety, a charcuterie board fits the bill. You can get vegetables, fruit, protein, nuts, olives, cheese, crackers and bread, as well as dipping sauces, and it can be made and adjusted to your preferences and budget.
Charcuterie boards are also one of the easiest crowd-pleasers at dinners and parties. They can be served as appetizers, a main dish or with your main dish, and you can even make dessert charcuterie boards.
And those are a lot of fun to make….and eat!
But charcuterie boards aren’t just for parties and fancy get-togethers. On busy nights when I’m not sure what to make, our family likes to whip out a large board, raid our pantry and refrigerator with whatever we have on hand, and make our own charcuterie board. Sometimes it includes deli meat, leftover pizza, chicken nuggets, chips and queso, or popcorn and we mix in any cheese, crackers, produce, and anything else we have. Together we make this and call it our smorgasbord and we have a little picnic on the floor enjoying this for dinner as a family. It’s nothing fancy, and it’s a great way to make leftovers fun!

Charcuterie boards are a way of putting together a relaxed and laid-back dish, but unlike our family smorgasbords, other boards do take a little work and planning beforehand. Although a board full of meat and cheese will be a hit no matter what, the task of putting together a charcuterie board can sometimes seem daunting and overwhelming. But I promise you anyone can put together a delicious board with a few tricks. Here are some helpful tips to making your boards not only delicious but eye-catching too.
Play with colors
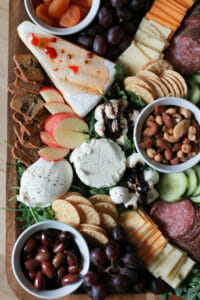
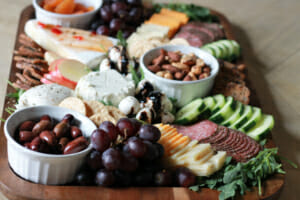
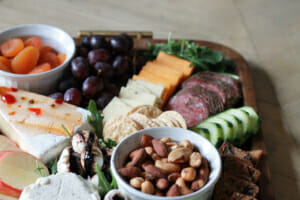
Color is everything! If you want your board to not only be delicious but a work of art, make sure you have an array of colorful food scattered throughout your board. Between the greens of vegetables, vibrant sweet peppers, variety of cheeses and nuts, bright berries, and a selection of breads, crackers, and meats, you will naturally have color. Depending on the season you are in, you will likely want to play with colors that work well. Fall is naturally reds, greens, browns whereas summer is more of the bright reds, blues, whites. It’s amazing the colorful array of foods we can pull from in nature.
Keep a variety of tastes and textures (and elevations)
A charcuterie board made of all soft cheese or textures is not a very exciting board. The thing I most love about charcuterie boards is not just the variety of flavors but textures. You have the soft brie with a crunchy apple atop a crispy cracker or baguette slice all finished with honey or fruit preserve. When buying produce, cheese, and crackers/bread, keep not only the variety of flavors in mind but textures. When creating the board, think elevation too. Allow certain parts to vary in height such as stacked cucumber or piles of grapes as well as higher bowls of olives, nuts, and dried fruit.
Work with your budget
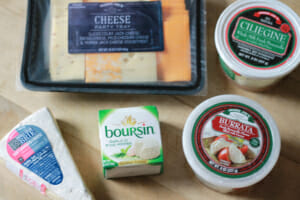
Charcuterie boards can easily be very expensive. But I am a believer that you can make a scrumptious board on a budget. I love shopping for most of my spread at Trader Joe’s or my local grocery store as they offer very affordable meats, cheeses, olives, and crackers. But you can affordably buy blocks of swiss, cheddar, and pepper jack from your local store and cut them yourself as well as wedges of brie and other soft cheeses. Sometimes I will splurge with more expensive cheese from speciality stores, but I still prefer a more affordable board.
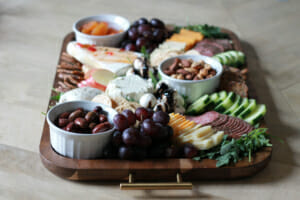
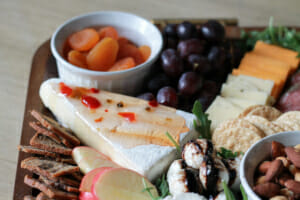
Use a wooden board or tray
Depending on the amount of people you’re feeding or what else you are serving, you can make your boards as large or as small as you’d like. A wooden cutting board makes a fantastic canvas for your spread as you can cut things on it and it makes a neutral background for your colorful variety of food. Decide on and gather the appropriate amount of food and find an appropriate-sized board to fit the amount of food you need. But a helpful reminder: you can always refill and restock on your board as needed so if you only have a smaller board but you’re feeding a large crowd, just replenish the board as needed.
Pick meats and cheese that would pair well with wine
The season we are in can often dictates the type of wine we’re drinking, but if you want a variety of wines, make sure to pick meats and cheeses that will pair well with the wine you are serving. I am not a wine expert, but your local wine stores can often recommend wine pairings for your choices. Keep in mind a red wine higher in alcohol and tannins will make salty meats taste saltier so choose a red that has less tannins and lower alcohol content. Champagne, Prosecco, sparkling wines, and Sauvignon Blanc are fantastic options to pair with saltier meats and cheeses.
Don’t be afraid to cut corners
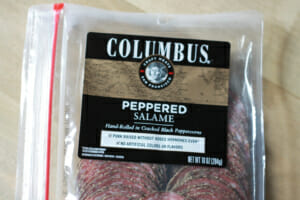
If you’re like me, time is precious. I am all for some time-saving techniques when possible. If you’re short on time, feel free to buy pre-cut or sliced meats and cheeses. There are often cheeses you can find perfectly sized for cheese boards. I like this option when I’m in need of a board but don’t want to have a lot of leftover cheese or spend time cutting everything.
Play with savory and sweet
The combination of a little salty and a little sweet is why charcuterie boards are so delicious. You can grab sweetness from grapes, apples, pears, berries, candied nuts, preserves, honey, dried fruits and slightly sweet crackers. When it comes to savory, I love the salted and peppered meats, savory cheeses, salted nuts, olives, crackers, bread, cucumber, and arugula. There are so many tasty combinations you can make with a variety of salty and sweet on your boards.
Don’t be afraid to crowd
I like to keep things simple, but when it comes to charcuterie boards, you want to fill in the spaces. If I see a spot needing something, I usually add a little arugula. I prefer to layer and stack as much as I can to create a full board. Avoid putting crackers near anything with moisture such as mozzarella balls or sauces as they tend to soften the crackers and make them soggy.
Plan in advance
Make a list of meats, cheese (soft, spreadable, hard), crackers/bread, fruits, vegetables and extras that go into bowls like dried fruits, nuts, and olives. When you go grocery shopping, you can have an idea of what you need to grab. Also keep in mind the amount of people you are feeding. When time comes to organize the board, you can make a rough layout on paper or on your board of what you are going to put where. But if I’m being honest, I don’t usually do that. I let the board organically happen. But one thing I do start with is placing my bowls for nuts, olives, and dried fruit on the board in advance and then working everything else in around it.
Most of all, have fun making these because they should be just as fun to make as to eat! And in the end, you can’t go wrong with a plate of cheese, meat, produce, and crackers.